Saturday, December 3, 2011

PunchClock 0.2.5 Released, JFace lessons

I finally got to a point where I thought enough of the nagging items with PunchClock were resolved that I would take the time to publish a new release. I am pretty proud of this release. There are no major new features but a lot of work went into making the code better, improving the infrastructure to make it a more rounded, solid product. For details on what was done, see  the PunchClock 0.2.5 release announcement.

 I've been personally using PunchClock versions daily to keep track of time at my work, I think I've pretty much gotten it to a stable, usable point. I don't see much new work going into it, unless I have some inspiration.


A couple of interesting lessons learned I think I'll share.

Utilizing JFace's built in ImageRegistry
I needed to add a custom error message to my Edit Session dialog. I did this using two labels. One that displays an icon (info, warning, error) and the other will have the message text. I tried using Label.setImage() for the label with the message text, however, the image "takes over" and no text is displayed, so I needed to keep them separate.

I know JFace must have the icons somewhere as they are used by the WizardPage status messages. It turns out they are available in the org.eclipse.jface.resource.JFaceResources.getImage() utility method. The icon images are available as constants of the org.eclipse.jface.dialogs.Dialog class.

Here is the setMessage() method from my custom EditSessionDialog class, it is called by a Listener that is attached to all the widgets in the form, listening on any change.

    /**
     * Updates the status message of this dialog with errors or other
     * information to display to the user.
     *
     * @param messageText
     *            - text to display
     * @param status
     *            - one of IMessageProvider constants
     */
    public void setMessage(String messageText, int status) {
        _logger.fine(messageText + ", status: " + status);
        Image messageImage = null;
        // based on status, display appropriate icon
        switch (status) {
        case IMessageProvider.INFORMATION:
            messageImage = JFaceResources.getImage(Dialog.DLG_IMG_MESSAGE_INFO);
            break;
        case IMessageProvider.WARNING:
            messageImage = JFaceResources
                    .getImage(Dialog.DLG_IMG_MESSAGE_WARNING);
            break;
        case IMessageProvider.ERROR:
            messageImage = JFaceResources
                    .getImage(Dialog.DLG_IMG_MESSAGE_ERROR);
            break;
        case IMessageProvider.NONE:
        default:
            messageImage = null;
            break;

        }
        // update the labels with new values
        _messageLabel.setText(messageText);
        _messageIcon.setImage(messageImage);
        _messageIcon.redraw();
        // resize widgets in dialog
        _messageIcon.pack(true);
        _messageLabel.pack(true);
    }


JFace ErrorDialog
As I transitioned all of the code in PunchClock away from writing out direct to the console, and instead used java.util.logging API, it became apparent that the way that exceptions were being handled was inconsistent, and in fact exceptions were getting thrown that were never handled. It seems that if there is no ExceptionHandler defined for the Window class, the exceptions don't get shown in the UI, though the program continues to run, leading to some unexpected results, such as clicking on a button and nothing seeming to happen.

So first step was to create a class that implements IExceptionHandler and then set it as the ExceptionHandler for my main window, using Window.setExceptionHandler(). This lets me catch all Throwables thrown and not caught in the PunchClock code.

Then I did find that JFace conveniently has a prebuilt dialog for displaying errors to the UI, which before I was able to do in one off cases using a custom built SWT dialog function. The example I took my queue from was here http://www.java2s.com/Code/Java/SWT-JFace-Eclipse/JFacesErrorDialogclass.htm

My example handleException method in my ExceptionHandler

/* (non-Javadoc)
     * @see org.eclipse.jface.window.Window.IExceptionHandler#handleException(java.lang.Throwable)
     */
    @Override
    public void handleException(Throwable arg0) {
        _logger.log(Level.SEVERE, "Uncaught exception from UI", arg0);
        // Create the required Status object
        Status status = new Status(IStatus.ERROR, "PunchClock", 0,
            "Unhandled Exception "+arg0.getMessage(), arg0);

        // Display the dialog
        ErrorDialog.openError(Display.getCurrent().getActiveShell(),
            "Error Occured", "Program Error. See PunchClock.log for more details.", status);
    }

It wasn't too clear what all these parameters do in terms of where they get used in the ErrorDialog. Here is an example of the error dialog produced by above code with a NullPointerException
The title of the dialog, and the first message line is from the openError() method, second and third parameters respectively, the fourth parameter, the Status object, controls the "Reason:" message, and if you include the actual Throwable in the status it gets displayed in the expandable Details box, although that is not required, you can just pass null.

Editor's note: stay tuned for updates to the punchclock wiki and FAQ pages as I round out documentation with all the updates from the latest releases.


Thursday, November 24, 2011

XNA .NET Bouncy Rectangle Tutorial

Happy Thanksgiving!, great to have a relaxing Thursday morning on the couch, doing nothing but watching last night's NHL highlights while tinkering with some new programming technologies, drinking a cup of strong coffee.

This past summer I spent some time trying to develop some sample game code (blog post: fixed-frequency-uncoupled-game-loop) in C, using libSDL on the Linux platform. I made some progress, but it was difficult, fairly low level, and I kind of lost motivation when work picked up for me this fall.

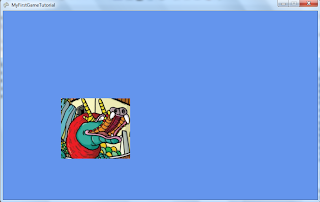
Recently I downloaded and installed the MS Visual Studio 2010 Express with XNA Game Studio 4.0 to give Windows/XBOX/Windows Phone game programming a shot to hopefully make faster progress. I have done C# before with my adventures in the WorldWind .NET project. Here is my result of my efforts this morning, a moving rectangle sprite:

It was fairly revealing that the easy to follow first tutorial for XNA Windows game development was creating a sprite that moves around a game window, just like my bouncy rectangle game. It took me about half an hour to build the tutorial, what took several days in C with libSDL. The basic project takes care of the game loop for it and it seems to be an uncoupled model between the game logic and drawing of graphics. The game played at a constant speed plus my CPU was only around 7% utilized.

I guess the tradeoff is being locked into Microsoft products, with little hope of ever porting to other platforms. But given I am my own developer, it makes sense to use this platform to actually get some programs made. I like how all the tools are basically free and well integrated together.


Saturday, October 1, 2011

Redwoods summer update

Its been a while since I wrote about our redwood seedlings. They have been growing indoors for a little over a year now. These pictures were actually taken a few months ago when tropical storm Irene came through New England. After a fairly quiet and slow winter, these guys both started major growth spurts in the late springtime and continued to grow new needles, shoots and branches. J2 especially gained a few inches growing a new shoot straight up nearly 6 inches from where the crown used to be. B2 has seen more modest growth, but was spreading out more along the branches near the base.
J2 growing well by the window

B2 is a bit crooked
Right now, J2 is getting to be about 1.5 feet tall, while B2 has not straightened out yet, and has stayed around a foot in height.

The trunk on both is getting stiffer and covered in a brownish-red bark, the needles used to feel softer to the touch. Overall both plants feel dry to the touch and a bit prickly due to the needles.

I generally water once or twice a week, and spray with water now and then in addition to keep the branches and needles moist.

Summer is about over now up here, so I would guess we won't see much growth, and even some browning of needles, over the winter.
J2 closeup

Saturday, September 24, 2011

PunchClock 0.2.3 Released

After putting PunchClock on hold to work on C coding this past summer. I've resumed work and completed a few features for PunchClock. Mainly these greatly help me in my own job, they probably could be useful for others.

Download PunchClock 0.2.3

Tour of whats new in PunchClock 0.2.3
  •  Added new feature: Stats widget in UI 
    • Tracks how long you are spending on the current task.
    • Keeps a running total of all tasks for that calendar day: "have I billed 8 hours to my client today?"
  • Brand new Export feature
    • File > Export launches a new wizard to export a file to Excel
    • Selectable Date Range
    • Excel 97-2003 format (.xls), compatible with OpenOffice, GoogleDocs
    • Exported Excel provides automatic summations of tasks for each day by project. Color coded by day for easier review.
    • Uses Apache POI library.
  • Fixed a bug on exit that wouldn't properly save the end time for a current session.
  • Behind the scenes all the UI has now been reimplemented using JFace
  • Fixed a few other dings and scratches.

I skipped a formal release of 0.2.2 as there wasn't much new for the end user, that release mainly dealt with bug fixing and refactoring for JFace.

I am getting close to finishing what I wanted to achieve now with PunchClock, It will now be something that will be an accelerator at my own job and I will try to share it with my team. There are a few things in the UI that I would like to tighten up. For example the layout changes a little too much when the main window is resized. I could add a few more options to the Export wizard. I currently don't have support .xlsx format output. Maybe when I get around to these last few areas I would be comfortable with a version 1.0 release.

Please let me know if you have any feedback or comments.

Saturday, August 27, 2011

Fixed Frequency Uncoupled Game Loop

Version 2 of the Bouncy Rectangle program has a refactored game loop engine. After looking around at ways to separate the rate that events happen in the game from the rendering speed of the system running the program I went with an approach called Fixed-Frequency Uncoupled method. Where the game engine will run certain events at fixed frequency, while uncoupling a second module of the program that does the rendering using as much CPU speed is available. To make it interesting I also added an AI opponent, which is another blue square that follows the player around the screen. (No music this time).

To implement multi-threading I used POSIX threads (-pthreads). The fixed frequency game logic would update the game state based on user input and the physics of the moving rectangle "characters". It would then sleep for 100 ms, basically updating the game state 10 times a second.

The render loop was in the main thread and would both update the screen with the updated game state as well as do some animation interpolation based on the trajectories of the rectangles from the last game state. This also had to trap any user input (keyboard keys) and then update the game state with these inputs for when the fixed-frequency thread would next check it. To avoid synchronization issues, I used mutexes when in critical sections that accessed the shared variables containing game state info. The render loop will run as fast as the system it runs on, on my box it was humming along at 140 fps.

This is a high level diagram of the separation of the game logic:

References:

Sunday, August 14, 2011

libSDL Project

For the last few weekends I have given PunchClock and my java work a break, to get back to the fun stuff in C. I am trying to learn the open source Simple DirectMedia Layer (libSDL) api for 2d graphics.

My first simple project was to draw a background and move an object around the foreground. Enter "Bouncy Rectangle".

This is a very simple program where you control the movements of the red square by using the keyboard arrows. Pressing in a direction will either speed you up or slow you down, when you hit one of the edges your speed will be translated into the opposite direction so you "bounce" like a pool ball.

I'd like to work further on separating the movement speeds from the "game loop" which will use 100% of whatever CPU you have if you let it, which would vary the speed from system to system.

The source code is all in one file, after installing libSDL (not so simple on Ubuntu) the program was developed in Eclipse CDT.

Full Source for reference:

/*
============================================================================
Name : BouncyRectangle.c
Author : ammianus
Version : 0.0.1
Copyright : Copyright Brian Laskey 2011
Description : Bouncy rectangle SDL example
Developed in Eclipse CDT, using SDL 1.3.0
============================================================================
*/

#include <stdio.h>
#include <sdl sdl.h="">

/* game loop states */
#define GAME_LOOP_RUNNING 1
#define GAME_LOOP_STOP 0

/* movement constant */
#define MAX_VELOCITY 20
#define VELOCITY_INCREMENT 10

/* pointer to the main window surface */
SDL_Surface *screen;

/*
* Draw the graphic to the coordinates specified on to the screen.
*
* (0,0) is the top left corner of the visible screen.
*
* \param graphic the pointer to a surface containing graphic
* to draw on screen
* \param x the x-coordinate on the screen surface
* of the top-left corner of the graphic to draw
* \param y the y-coordinate on the screen surface of the top-left corner
* of the graphic to draw
*/
void drawGraphic(SDL_Surface *graphic, const int x, const int y) {
/*initialize SDL_Rect struct to hold destination blitting data*/
SDL_Rect dst;

/*fill dst with relevant information*/
dst.x = x;
dst.y = y;
dst.w = graphic->w;
dst.h = graphic->h;

/*blit the graphic to the screen*/
SDL_BlitSurface(graphic, NULL, screen, &dst);
}

/*
* Check if the velocity plus the increment is under max velocity
*/
Uint8 checkVelocity(int velocity) {
Uint8 underMax;

if (velocity + VELOCITY_INCREMENT <= MAX_VELOCITY) { underMax = 1; } else { underMax = 0; } return underMax; } /* * Check if the velocity minus the increment is under absolute max velocity */ Uint8 checkNegativeVelocity(int velocity) { Uint8 underMax; if (abs(velocity - VELOCITY_INCREMENT) <= MAX_VELOCITY) { underMax = 1; } else { underMax = 0; } return underMax; } /* * Process the SDL Event queue * * \param running pointer to running flag for game loop (passed by reference) * \param velocity_y pointer to velocity_y incremented * or decremented by up or down (passed by reference) * \param velocity_x pointer to velocity_x incremented * or decremented by left or right (passed by reference) */ void processEvents(int *running, int *velocity_y, int *velocity_x) { /*e stores the event union which is fetched from the event queue*/ SDL_Event e; /*check the event queue*/ while (SDL_PollEvent(&e)) { switch (e.type) { case SDL_KEYDOWN: if (e.key.keysym.sym == SDLK_ESCAPE) { *running = GAME_LOOP_STOP; } else if (e.key.keysym.sym == SDLK_DOWN) { /* increase or decrease current velocity */ if (checkVelocity(*velocity_y)) *velocity_y = *velocity_y + 10; } else if (e.key.keysym.sym == SDLK_UP) { if (checkNegativeVelocity(*velocity_y)) *velocity_y = *velocity_y - 10; } else if (e.key.keysym.sym == SDLK_LEFT) { if (checkNegativeVelocity(*velocity_x)) *velocity_x = *velocity_x - 10; } else if (e.key.keysym.sym == SDLK_RIGHT) { if (checkVelocity(*velocity_x)) *velocity_x = *velocity_x + 10; } break; case SDL_QUIT: *running = GAME_LOOP_STOP; break; } } fprintf(stdout, "velocity_x: %d, velocity_y: %d\n", *velocity_x, *velocity_y); } /* Call this instead of exit(), so we can clean up SDL: atexit() is evil. */ static void quit(int rc) { SDL_Quit(); exit(rc); } /* * main: no arguments * * \return: * 0 success * 1 could not init SDL * 2 could not create the screen surface * 3 graphics error */ int main(void) { Uint8 video_bpp; Uint32 videoflags; int x_offset; int y_offset; int video_w, video_h; int velocity_x, velocity_y; /*declare pointer to reference the graphic * (done here for plain C compatibility)*/ SDL_Surface *background_graphic; SDL_Surface *bouncy_rectangle; int running; int fillRectRet; /* Initialize SDL */ if (SDL_Init(SDL_INIT_VIDEO) < 0) { fprintf(stderr, "Couldn't initialize SDL: %s\n", SDL_GetError()); return (EXIT_FAILURE); } video_bpp = 0; videoflags = SDL_HWSURFACE | SDL_DOUBLEBUF; video_w = 640; video_h = 480; puts("!!!SDL_INIT!!!"); screen = NULL; /*set a 640x480x32 double-buffered window*/ if ((screen = SDL_SetVideoMode(video_w, video_h, video_bpp, videoflags)) == NULL) { fprintf(stderr, "Couldn't set %dx%d %d video mode: %s\n", video_w, video_h, video_bpp, SDL_GetError()); quit(2); } /*Example: set up a fullscreen double-buffered hardware display * surface at 640x480x32*/ /*SDL_Surface *screen = * SDL_SetVideoMode(640,480,32,SDL_HWSURFACE|SDL_FULLSCREEN|SDL_DOUBLEBUF);*/ /*load the background graphic from a file*/ background_graphic = NULL; background_graphic = SDL_LoadBMP("background1.bmp"); if (background_graphic != NULL) { puts("!!!SDL_LoadBMP!!!"); } else { fprintf(stderr, "my_graphic is NULL: %s\n", SDL_GetError()); quit(3); } /* create moving red rectangle on the surface */ bouncy_rectangle = NULL; bouncy_rectangle = SDL_CreateRGBSurface(0, 50, 50, 32, 0, 0, 0, 0); if (bouncy_rectangle != NULL) { fillRectRet = SDL_FillRect(bouncy_rectangle, NULL, SDL_MapRGB( screen->format, 255, 0, 0));
if (fillRectRet == 0) {
puts("Filled bouncy_rectangle");
} else {
fprintf(stderr, "SDL_FillRect error: %s\n", SDL_GetError());
}
} else {
fprintf(stderr, "bouncy_rectangle is NULL: %s\n", SDL_GetError());
quit(3);
}

/* initial values */
running = GAME_LOOP_RUNNING;
x_offset = 0;
y_offset = 0;
velocity_x = 0;
velocity_y = 0;
while (running) {
/*clear the screen*/
fillRectRet = SDL_FillRect(screen, NULL, SDL_MapRGB(screen->format, 0,
0, 0));
if (fillRectRet == 0) {
puts("!!!Screen Cleared!!!");
} else {
fprintf(stderr, "SDL_FillRect error: %s\n", SDL_GetError());
}

/* calculate the boundary of bouncy_rectangle against edges of screen */
/* x-axis */
if ((x_offset + 50 + velocity_x > video_w) || (x_offset + velocity_x
< 0)) { velocity_x = velocity_x * -1; } x_offset = (x_offset + velocity_x); /* y-axis */ if ((y_offset + 50 + velocity_y > video_h) || (y_offset + velocity_y
< 0)) { velocity_y = velocity_y * -1; } y_offset = (y_offset + velocity_y); /*draw the background*/ drawGraphic(background_graphic, 0, 0); fprintf(stdout, "x %d, y %d\n", x_offset, y_offset); /* move the rectangle across the screen */ drawGraphic(bouncy_rectangle, x_offset, y_offset); puts("!!!Draw!!!"); /*update the screen*/ SDL_Flip(screen); puts("!!!Flip!!!"); /*check the event queue*/ processEvents(&running, &velocity_y, &velocity_x); /* pause the program so CPU doesn't go to 100% */ SDL_Delay(40); } /*deinitialize SDL*/ SDL_Quit(); puts("!!!SDL_Quit!!!"); return EXIT_SUCCESS; }


The build command I used was:

gcc -O0 -g3 -pedantic -Wall -c -fmessage-length=0 -MMD -MP -MF"src/BouncyRectangle.d" -MT"src/BouncyRectangle.d" -o"src/BouncyRectangle.o" "../src/BouncyRectangle.c"


And the linking command was:

gcc -L/usr/local/lib -o"SB-Proto1" ./src/BouncyRectangle.o -lSDLmain -lSDL


References
Helpful sites that allowed me to get this far

Friday, July 22, 2011

On Configuring Automated Builds on an Amazon EC2 micro-instance using Jenkins, SVN and Apache

I am a big fan of the continuous integration approach with using tools and build scripts to automate the build process for programs. Combine this with comprehensive unit testing and static analysis provides some easy ways to improve the quality of code.

So I wanted to implement a continuous integration set up, partly as a way to improve my infrastructure around the PunchClock project, as well as a chance to explore some new technologies, especially Amazon Web Services.

What I settled on was to create a "build machine" using Jenkins CI, formerly Hudson, an open source program specifically for automating building software in a continuous integration environment. On the same server I would also host my Subversion repository (SVN), and being that it is an Amazon EC2 instance I have less worry of a possibility of a catastrophic loss of data from my current Ubuntu box at home. Both SVN and the Jenkins web application would sit behind an Apache2 Web Server. All of this would be on a Debian Linux distro running as an EC2 instance. (I chose to go with Debian purely to gain exposure to other distros besides Ubuntu). I learned a lot from this set up, the AWS/EC2 was actually more challenging than you would normally find from a hosted server, but their AWS Management Console allows you to do most operations pretty easily.


Prereqs
  1. Install Apache2 if not present
    On the default Debian install Apache is present, but on the Debian EC2 AMI I used it wasn't installed.
    apt-get install apache2
  2. Install Java 1.6 (update 25)
    You'll need to edit your /etc/apt/sources.list see http://jayraj87.blogspot.com/2010/02/installing-sun-java6-jdk-in-debian.html
  3. Install Ant 1.8.0
    • installs version 1.8.0 to /usr/bin/ant (/usr/share/ant)
      apt-get install ant
    • copy junit.jar to ANT_HOME\lib (junit 3.8.2 or later download here)
  4. Install SVN and Repository
  5. Before you begin I assume you have your own working ANT script that would compile, run JUnit tests, run any static analysis utilities (e.g. FindBugs or CheckStyle) and package your project into artifacts for distribution. The PunchClock application had an existing ANT build.xml that I started from.

Installation

All of these steps I honed on a default Debian install. I tested this on VMWare Player running the 6.0.1a "Squeeze" Debian install, from an iso file found on BitTorrent. Once I had got the steps down, basically the same applied to installing on the Debian instance on Amazon EC2 except for a few issues. All of these steps were performed as root unless otherwise noted.
  1. Install Jenkins LTS

    • wget -q -O - http://pkg.jenkins-ci.org/debian/jenkins-ci.org.key | sudo apt-key add -
      • Add site to debian packages /etc/apt/sources.list: deb http://pkg.jenkins-ci.org/debian binary/
      apt-get update
      apt-get install jenkins

    • Installs at http://localhost:8080/ by default
    • Followed steps to configure Jenkins to run behind Apache  https://wiki.jenkins-ci.org/display/JENKINS/Running+Jenkins+behind+Apache
      • configuration is in /etc/default/jenkins
      • I changed default port from 8080 for added security
      • add HTTP_HOST=127.0.0.1 #only takes requests from apache2
      • append to JENKINS_ARGS="... --prefix=/jenkins httpListenAddress=$HTTP_HOST"
    • To restart after config changes:
      /etc/init.d/jenkins force-reload
    • Log file will be placed in /var/log/jenkins/jenkins.log. Check this file if you are troubleshooting Jenkins.

  2. Setting up apache for Jenkins
    Apache will be a reverse proxy to the Jenkins web application. We've already set up Jenkins to only accept requests from Apache (localhost), we will also add basic authentication. See also (https://wiki.jenkins-ci.org/display/JENKINS/Installing+Jenkins+on+Ubuntu)
    • Create or copy this file called "jenkins" to /etc/apache2/sites-available
      <VirtualHost *:80>
      ServerAdmin your.email@yourorganization.com
      ServerName your.ip.here.goes.here
      ServerAlias debian-build
      ProxyRequests Off
      <Proxy *>
      Order deny,allow
      Allow from all
      </Proxy>
      ProxyPreserveHost on
      ProxyPass /jenkins http://localhost:8089/jenkins
      ProxyPassReverse /jenkins http://localhost:8089/jenkins
      <Location /jenkins/>
      AuthType basic
      AuthName "Jenkins"
      AuthUserFile "/etc/apache2/sites-available/jenkins.htpasswd"
      Require valid-user
      </Location>
    • Run the following commands to set up Apache for virtual hosts and create the site "/jenkins"
      a2enmod proxy
      a2enmod proxy_http
      a2enmod vhost_alias
      a2ensite jenkins
      apache2ctl restart

    • Note: apache logs under /var/log/apache/error.log
    • I am no apache security configuration expert, but following this article was useful for configuring basic authentication for now. https://wiki.jenkins-ci.org/display/JENKINS/Apache+frontend+for+security
      • E.g in my case it was something like this: htpasswd -cm /etc/apache2/sites-available/jenkins.htpasswd your-username
      • In my opinion security is often overlooked in small scale projects, other general, but useful Apache security tips: http://httpd.apache.org/docs/2.0/misc/security_tips.html
    • After all of this you should be able to access Jenkins with the specified username/password at a URL like
      • http://your.ip.here.goes.here/jenkins

  3. Install checkstyle
    For CheckStyle analysis of Java code (assuming you've already configured your project and build.xml to run CheckStyle during the build)
    • Download checkstyle-5.3-bin.tar.gz (at the time of this post 5.4 is available)
    • Copy to somewhere on the server e.g. /usr/share
    • Extract the tar
      $/usr/share# tar zxf check checkstyle-5.3-bin.tar.gz
    • Log in to Jenkins and navigate to Manage Jenkins > Configure System
      • Check "Environment Variables" under Global Properties
      • Add name = "CHECKSTYLE_HOME" value = "/usr/share/checkstyle-5.3"
  4. Install findbugs
    Similarly for FindBugs analysis of Java code. (* I couldn't actually get this to successfully run on the EC2 Micro instance, it appeared to make the server run out of memory and the Jenkins build process would crash.)
    • Download findbugs-1.3.9.tar.gz
    • Copy to somewhere on the server e.g. /usr/share
    • Extract the tar
      $/usr/share# tar zxf check findbugs-1.3.9.tar.gz
    • Log in to Jenkins and navigate to Manage Jenkins > Configure System
      • For "Environment Variables" under Global Properties
      • Add name = "FINDBUGS_HOME" value = "/usr/share/findbugs-1.3.9"
    • Copy the findbugs_ant.jar to ANT_HOME/lib
      • $/usr/share/findbugs-1.3.9/lib# cp findbugs-ant.jar /usr/share/ant/lib
  5. Manage Jenkins plugins for Static Analysis
    • Log in to and navigate to Jenkins > Manage > Available >
    • Check the following plugins
      • Static Analysis Utilities
      • Checkstyle Plug-in
      • FindBugs Plug-in
      • etc...
    • Jenkins may need to be restarted manually using /etc/init.d/jenkins force-reload

  6. Configure Jenkins project: PunchClock
    • Log in to Jenkins and click New Jobs from the left menu. Fill out the following form. The details will vary per your project and needs.
    • Job Name: PunchClock
    • Set repostitory to Subversion
      • URL: http://ip.of.my.svn.repo/svn/trunk/TimeTrack
      • Will fail, need to enter credentials
    • Add Build Step > Invoke Ant
    • Check publishing options
      • Publish Checkstyle analysis results
      • Publish FindBugs analysis results
      • Publish combined analysis results
      • Publish JUnit test result report
        • My Test Result XMLs use the pattern "TEST*.xml"
      • Archive the artifacts
        • This depends on what artifacts your build.xml creates, my PunchClock complete packages are zipped in the distributions folder of my work space so: Files to archive: "distributions/*.*"
    • Optional you can set an automated checkout strategy. Under Build Triggers I chose "Poll SCM"
      • For schedule I used "@hourly"

Amazon EC2 Configuration

This is a whole other technology, which deserves its own post. I'll touch on what I did find in the end. I was motivated to look into this, Amazon AWS recently began offering the ability to have a single "micro" sized instance hosted for free. This gets you among other things, a virtual machine with 620 MB of memory, a single "virtual cpu", about up to 10GB EBS storage space, the OS of your choice* and a certain monthly bandwidth. I haven't been on the service a month yet, so we'll see how I get billed.

*The idea with these instances is that they are virtual machines that you can start from a pre-packaged snapshot referred to as an AMI. Amazon provides some (of their own linux flavor) but most appear to be community created public images for different OS's. I found a lot of information around this whole topic, as well as really well done, standardized AMI's from http://alestic.com/, which focuses mostly on Ubuntu images. The EC2StartersGuide for Ubuntu is also a great starting resource, especially for managing and configuring your EC2 instances from a Ubuntu desktop. In my case with Debian, the ec2debian google group was also a good place to start.

Long story short, when you sign up for AWS and log in to the Management Console, go to "Instances" and click on Launch Instance, you can search for an select a starting AMI. I went wit this one from the ec2debian group

us-east-1
i386 EBS: ami-0ce41865
x86_64 EBS: ami-80e915e9
i386 8gb instance: ami-c041bda9
x86_64 8gb instance: ami-1cbc4375


The distinction between instance and EBS is that instance root volume apparently doesn't survive a stoppage of the VM, not sure the benefit of that other than to keep things clean? I went with the x86_64 EBS: ami-80e915e9 after a false start with the 32 bit version.

Note these all start out with a 1GB Root volume. Needs to be reized.

After booting up, and figuring out how to connect to the instance (only can use ssh, scp...be prepared to use vi!).

Some issues I hit:
Java 6 won't install on 32-bit "micro" instance
Originally I tried a 32 bit debian instance AMI. Hit this bug everytime I installed sun-java6-jdk: https://bugs.launchpad.net/ubuntu/+source/linux-ec2/+bug/634487 which basically caused the whole instance to hang due to 100% CPU usage from a runaway install process. The only fix was to use a 64-bit AMI.

Enlarging EBS Root Volume
After finally installing everything and pressing the final key-stroke to start Jenkins, I was severly disappointed to only get a 503: Service Unavailable error from Apache. The Jenkins log wasn't created even and the Apache logs just stated that it couldn't connect to the Jenkins site. After banging my head against the wall, I found a not enough disk space error in the /var/logs/daemon log. It turned out I maxed the 1GB initial volume size. Unfortunately EBS volumes can't just be "dialed up" like you can do with a VMWare Player VM. Some guidance can be found here on how to resize a root EBS volume:  http://alestic.com/2010/02/ec2-resize-running-ebs-root

Basically what I ended up doing using the AWS Management Console
  1. Create EBS snapshot
  2. Stop Instance
  3. Detach old volume
  4. create new volume from snapshot
  5. Attach new volume (as /dev/sda1...same as old volume!)
  6. Start Instance
  7. resize2fs /dev/xvda1 (Debian is tricky that it doesn't list the volume as /dev/sda1). It did an online resize in about 5 minutes and I was good to go.
Sunday, June 19, 2011

Converting SWT to JFace

It has been a slow couple of weeks for my coding. I've had a lot of activities going on which have kept me away. Today I focused on making a major architectural change to PunchClock by reimplementing the view layer of PunchClock to completely use the JFace pattern instead of the pure SWT that was mostly there.

To do this I had to rewrite all of my custom SWT dialog shell code using various subclasses of the JFace Dialog class. All of my menu bar was replaced using a set of JFace MenuManagers with related Actions. Finally the main application Shell was implemented through a new class that extends ApplicationWindow and acts as the "central glue" for the new JFace implementation. As always the tutorials by Adrian Emmenis, "Using the Eclipse GUI outside the Eclipse Workbench", were my main guide in this process although was also able to use the SWT/JFace javadocs available in the Eclipse Platform API Specification reference site.

The purported benefits of using JFace is that it "is a UI toolkit that provides helper classes for developing UI features that can be tedious to implement". So one would hope that this could be quantified in terms of fewer lines of code, easier readability and/or maintainability. As PunchClock 0.2.1 is a fairly stable, simple application, using a couple of JFace dialogs, but not depending on it too much, I was hoping to see evidence of a benefit by switching over. To be honest, the experience today felt like rearranging deck chairs on a cruise ship. Generally what I needed to do was move methods around from a class that previously managed most of the SWT UI interactions and updates and put these chunks of code into other more object oriented classes, such as Dialogs, ApplicationWindow or Actions. A lot of my EventListeners, for menu items for example were easily converted to JFace Actions with a couple of constructor changes and converting the implementation of SelectionListener.widgetSelected() method to override the Action.run() method. For example:
Before old SWT code with Listener for the "Open" menu item

/**
* @param shell
*/
public OpenAction(Shell shell, TimeTrackController controller, DialogSettings settings) {
_shell = shell;
_controller = controller;
_settings = settings;
}

/*
* (non-Javadoc)
*
* @see org.eclipse.swt.events.SelectionAdapter#widgetSelected
* (org.eclipse.swt.events.SelectionEvent)
*/
public void widgetSelected(SelectionEvent e) {

// create new dialog where user enters the project name
final Shell dialog = new Shell(_shell, SWT.DIALOG_TRIM
| SWT.APPLICATION_MODAL);
dialog.setText("Open Project");
FormLayout formLayout = new FormLayout();
formLayout.marginWidth = 10;
formLayout.marginHeight = 10;
formLayout.spacing = 10;
dialog.setLayout(formLayout);
// position near parent window location
dialog.setLocation(_shell.getLocation().x + 10,
_shell.getLocation().y + 10);
// text displayed in dialog
Label openProjectLabel = new Label(dialog, SWT.NONE);
openProjectLabel.setText("Type a Project name:");
FormData data = new FormData();
openProjectLabel.setLayoutData(data);

//for combo box
String[] options = new String[]{};
try{
List availableProjects = _controller.getProjects();
options = new String[availableProjects.size()];
availableProjects.toArray(options);
}catch(IOException ioe){
ioe.printStackTrace();
}


//creates cancel button
Button cancel = new Button(dialog, SWT.PUSH);
cancel.setText("Cancel");
data = new FormData();
data.width = 60;
data.right = new FormAttachment(100, 0);
data.bottom = new FormAttachment(100, 0);
cancel.setLayoutData(data);
cancel.addSelectionListener(new SelectionAdapter() {
public void widgetSelected(SelectionEvent e) {
System.out.println("User cancelled dialog");
dialog.close();
}
});


//creates text box
//final Text textBox = new Text(dialog, SWT.BORDER);
data = new FormData();
data.width = 200;
data.left = new FormAttachment(openProjectLabel, 0, SWT.DEFAULT);
data.right = new FormAttachment(100, 0);
data.top = new FormAttachment(openProjectLabel, 0, SWT.CENTER);
data.bottom = new FormAttachment(cancel, 0, SWT.DEFAULT);
//textBox.setLayoutData(data);
//textBox.forceFocus();

final Combo combo = new Combo(dialog, SWT.NONE);
combo.setItems (options);
//set the default text to the first option, can be overridden by user
if(options.length > 0){
String selectedOption = Configuration.getSetting(_settings, Configuration.LAST_PROJECT, options[0]);
combo.setText(selectedOption);
}
combo.setLayoutData(data);
combo.forceFocus();


//creates ok button
Button ok = new Button(dialog, SWT.PUSH);
ok.setText("OK");
data = new FormData();
data.width = 60;
data.right = new FormAttachment(cancel, 0, SWT.DEFAULT);
data.bottom = new FormAttachment(100, 0);
ok.setLayoutData(data);
ok.addSelectionListener(
// nested inner class
new SelectionAdapter() {

/*
* (non-Javadoc)
*
* @see org.eclipse.swt.events.SelectionAdapter
* #widgetSelected (org.eclipse.swt.events.SelectionEvent)
*/
public void widgetSelected(SelectionEvent e) {
String selectedProject = combo.getText();
//set the project in the controller
_controller.setProject(selectedProject);
//updated the last project setting with chosen value
_settings.put(Configuration.LAST_PROJECT, selectedProject);
// close the message dialog
dialog.close();

}
});


dialog.setDefaultButton(ok);
dialog.pack();
dialog.open();
}


Now becomes just:

/**
* @param shell
*/
public OpenAction(PunchClockWindow window) {
_window = window;
setText("&Open Project...\tCTRL+O");
ImageRegistry reg = Resources.getImageRegistry();
setImageDescriptor(reg.getDescriptor(Resources.IMAGES_FOLDER_OPEN_PNG));
}


/* (non-Javadoc)
* @see org.eclipse.jface.action.Action#run()
*/
public void run() {

// create new JFace dialog where user enters the project name
OpenProjectDialog projDialog = new OpenProjectDialog(_window);
projDialog.open();
}


Now, a lot of the code above is actually still there, just contained in the new object OpenProjectDialog which extends JFace's Dialog class. The one big benefit I notice with Dialogs is that you get the OK and Cancel buttons "for free". So instead of needing to build the popup window from scratch as shown above, I just overrode and implemented the createDialogArea() and okPressed() methods from Dialog with my custom functions. That completely removes maintaining the Cancel button code from my responsibility for example.

Whether the conversion to JFace has objectively produced less code for the same exact results, I utilized a free code line counter, CLOC, to check how much improvements there were at all.


Before (v0.2.1 code pulled from SVN)
http://cloc.sourceforge.net v 1.53  T=0.5 s (64.0 files/s, 10350.0 lines/s)
-------------------------------------------------------------------------------
Language                     files          blank        comment           code
-------------------------------------------------------------------------------
Java                            32            725           1680           2770
-------------------------------------------------------------------------------
SUM:                            32            725           1680           2770
-------------------------------------------------------------------------------
After JFace conversion of view layer 
http://cloc.sourceforge.net v 1.53  T=0.5 s (66.0 files/s, 9538.0 lines/s)
-------------------------------------------------------------------------------
Language                     files          blank        comment           code
-------------------------------------------------------------------------------
Java                            33            705           1510           2554
-------------------------------------------------------------------------------
SUM:                            33            705           1510           2554
-------------------------------------------------------------------------------
There was an 8% shrinking of the code. Not too bad, I'll take it.

JFace ApplicationWindow's mysterious separator line
One quirk that I did come across after the conversion to pure JFace implemenation of the main window, was that it seems the default behavior for ApplicationWindow is to create a separator line at the top of the window's "contents" panel. This is in case you have a menu. This wasn't there before the port, so I was pretty confused. I began coloring all the widgets in my UI to try to understand what was creating this line but had no luck, because it wasn't in my code after all. See the strange extra line on the left.
JFace application window adds this extra line, shown on the left.


In my ApplicationWindow class, it turns out you need to override the ApplicationWindow#showTopSeperator() method and make sure it returns false if you don't need it, and this depends on which OS you have e.g. for Windows 7 and Mac OSX the menu bar is separate from the application panel anyways, no separator is needed. It may mean that for some OSs like Win XP for example, I might need to make the code smarter to conditionally show the separator or not.

Saturday, June 4, 2011

Punch Clock 0.2.1 and clickable edit button for SWT tables

After the release of Punch Clock 0.2.0 I observed a few issues that needed to be solved. I've just posted a new version, Punch Clock 0.2.1 which has these minor fixes and a new dialog to view the "audit" data in the UI.

One of the new features I added since 0.2.0 which I wanted to write about is the "Fix Session" button I have added to each row of the main table of data in PunchClock. This lets you go back after the fact and modify the times or other details for a record that has been saved. This was a true life-saver for me in practice as you often forget to start the timer at the right time, or want to put clarifying comments in later, etc. I implemented this with a click-able SWT button on every row with a wrench style icon.
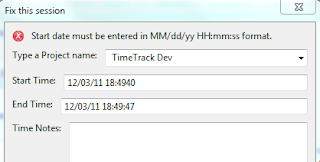
Clicking on that button brings up a simple form in a dialog for editing the data in that row. Since I couldn't find an example that was exactly like this, I came up with an approach, still not sure if this is the most efficient way to do it. Here is how this was accomplished.

Using TableEditor to add the Buttons
I started from Snippet126 from the Eclipse SWT snippets site: "Table example snippet: place arbitrary controls in a table".

Using a class called org.eclipse.swt.custom.TableEditor which you construct with your Table, you specify a new control and place it against a particular TableItem in that Table, and even specify which column that control should be over. One way to picture this is that the TableEditor as floating above the Table as an invisible layer which you can put controls on that overlap your Table.

For example in my case, where table is an instance of org.eclipse.swt.widgets.Table


//get all the current items (rows) from your SWT table
TableItem [] items = table.getItems ();
for (int i=0; i<items.length; i++) {

//create the editor
TableEditor editor = new TableEditor(table);

//get the row
TableItem item = items[i];
//create my button
Button button = new Button (table, SWT.PUSH);
//my code to set the button icon image from an JFace ImageRegistry
button.setImage(Resources.getImageRegistry().get(Resources.IMAGES_EDIT_PNG));
button.setSize(16, 16);
button.setToolTipText("Fix this session");
button.pack();

//not sure if necessary, prevent the editor from being smaller than button
editor.minimumWidth = button.getSize ().x;
editor.horizontalAlignment = SWT.RIGHT;
//set the button to float over column 5 for this item
editor.setEditor (button, item, 5);
}


And that is it for the set up. Note regarding the JFace ImageRegistry, I have begun to use an excellent tutorial/article called Using the Eclipse GUI outside the Eclipse Workbench which has three parts. Part 2: Using the JFace image registry, describes the approach to creating an org.eclipse.jface.resource.ImageRegistry that is then referred to whenever you need to display the same image repeatedly in the UI, as I do in the case for the little wrench icon.

Handling Button Clicks
While the above code drops the buttons on the tables, I need to then hook them up to display the edit dialog. This is done through adding a Selection Listener to the button being added to each row.

Again, I am not sure if this is the greatest way to implement this code, but I created a class called EditButtonListener which implemented the org.eclipse.swt.widgets.Listener interface, specifically calling my new dialog from the handleEvent() method. Something like this (with my form logic simplified to pseudo code).


public class EditButtonListener implements Listener {

private TableItem _tableItem;

/**
* @param tableItem - dependency injection, keeps track of the row
*/
public EditButtonListener(TableItem tableItem) {
_tableItem = tableItem;
}

/* (non-Javadoc)
* @see org.eclipse.swt.widgets.Listener#handleEvent(org.eclipse.swt.widgets.Event)
*/
@Override
public void handleEvent(Event event) {
//get the parent shell for my table, needed to launch my new SWT dialog
Shell lShell = _tableItem.getParent().getShell();
//in my table the first column is a unique id
String sessionIdString = _tableItem.getText(0);
System.out.println("Button click for session id: "+sessionIdString);

final TimeSession selectedSession;
try{
//retrieve the selected time session from the back end
//...
}catch(Exception e){
throw new IllegalStateException(e);
}

// create new dialog where user enters the project name
final Shell dialog = new Shell(lShell, SWT.DIALOG_TRIM
| SWT.APPLICATION_MODAL);
dialog.setText("Fix this session");
FormLayout formLayout = new FormLayout();
formLayout.marginWidth = 10;
formLayout.marginHeight = 10;
formLayout.spacing = 10;
dialog.setLayout(formLayout);
// position near parent window location
dialog.setLocation(lShell.getLocation().x + 10,
lShell.getLocation().y + 10);
dialog.setSize(400, 400);
// text displayed in dialog i.e. field labels
//...

// create combo box drop down selection
//final Combo combo = new Combo(dialog, SWT.NONE);
//combo.setItems (options);
//set current value to selected session's value
//...
// text displayed in dialog i.e. field labels
//...
//next text box field
//final Text startTimeBox = new Text(dialog, SWT.SINGLE | SWTSWT.BORDER );
//...
//etc...

//create cancel button
//Button cancel = new Button(dialog, SWT.PUSH);
//cancel.setText("Cancel");
//layout stuff...
//add listener for when cancel is pressed:
//cancel.addSelectionListener(new SelectionAdapter() {
// public void widgetSelected(SelectionEvent e) {
// System.out.println("User cancelled dialog");
// dialog.close();
// }
//});

//creates ok button
//Button ok = new Button(dialog, SWT.PUSH);
//ok.setText("OK");
//layout stuff...
//add listener when OK button pressed
//ok.addSelectionListener(
// nested anonymous inner class for listener, could be separate class too
//new SelectionAdapter() {

/*
* (non-Javadoc)
*
* @see org.eclipse.swt.events.SelectionAdapter
* #widgetSelected (org.eclipse.swt.events.SelectionEvent)
*/
//public void widgetSelected(SelectionEvent e) {

//when OK is pressed save the current changes to the backend
//...

// close the message dialog
//dialog.close();

//}

//});

//finish set up of dialog and call open()
//...
//dialog.setDefaultButton(ok);
//dialog.pack();
//dialog.open();
}

}


To link the EditButtonListener back to the button I created above you would modify the button creation above slightly to include adding the Listener:

button.addListener(SWT.Selection, new EditButtonListener(item));

Now when clicked the form pops up


Improvements
One way that I would like to try to improve on this design is to be able to reuse the same EditButtonListener, so instead of creating a new listener instance for each TableEditor button, I would reuse the same instance and it would determine which button was pressed from the event.item passed in to handleEvent(). I also want to remove all the dialog code from the EditButtonListener and implement that using a JFace dialog in its own class.

Sunday, May 15, 2011

Giant Sequoia, Dawn Redwood in downtown Boston

Recently had a chance to spend an afternoon with family in Boston Public Gardens. I recently read online that there was a Giant Sequoia (Sequoiadendron giganteum) growing in the Public Gardens. I have lived in the region for a long time, and never had any idea.

After walking in the park, keeping a lookout at the various conifer trees, dodging the crowds of tourists on a chilly Spring day we were surprised to first come across a Dawn Redwood (Metasequoia glyptostroboides), a relative of the Sequoia and Redwoods native to China. Close up the needles are tightly packed and arranged flatly, almost giving the appearance of a broadleaf. I don't think I have ever seen a Dawn Redwood, it was probably 4' in diameter, hard to give a good height, maybe 50' tall. There was a faded, old, plaque identifying the tree. The tree is located on the Arlington St. side of the swan boats pond, North of the George Washington statue along a path.

A little further around the North side of the pond we found the Giant Sequoia. It was a spotted red with a very fibrous bark that looked like bleached mulch. From a distance it didn't look like a normal pine or spruce, so in that sense it stood out, it looked a bit sparser and irregular, without much of conical shape.

Of course we hung around to take some pictures. This is the first sequoia I've seen outside of California in person, and it was good to confirm that they do grow outdoors out here. However, the "giant sequoia", or Sequoiadendron are not to be confused with the Coastal Redwood which I have been trying to grow here indoors. I have never seen anywhere that the Coastal Redwood, which are adapted to the foggy Pacific coastline, can survive our winters. The Sequoiadendron is native to the Sierra Nevada mountains, so it can tolerate cold better. The Dawn Sequoia, being deciduous also apparently can grow here in this climate zone.

Up close I was amazed by how spikey the branches and needles were, it wasn't like my redwood seadlings which have fairly smooth bark on the branches with softer needles. The sequoia's branches were much denser with pretty short, sharp and stiff needles. There were a few fallen twigs around and we were able to get a good whiff of the tree's odor, which smelled nice, like a Christmas tree or wreath. It is amazing these are growing right in the center of city like this.

Later on I was browsing around various sites trying to find some more data on these trees, the Public Garden website had zero information and I haven't found anything else official about them. I came across a crowd-sourced site iNaturalist.org where users post pictures of wildlife and try to identify them. A user has posted a number of trees from the Public Garden. Apparently there are two Dawn Redwoods, as well as the one Giant Sequoia. There is a project dedicated to people making observations of "Redwoods", including the Sequoia and Dawn Redwood species, it is called RedwoodWatch organized by the Save the Redwoods League who aim to document the "in what climates redwoods can survive and track the redwood forests' migration over time.". I like the idea of the site and hope to contribute some of my own observations some day. However, at this point, not sure what merits being "observed". Also while interesting that there are Redwood tree species growing here, it is a somewhat artificial environment, I am sure there is a lot of care given to those trees in Public Gardens or in the nearby Arnold Arboretum.


Saturday, May 14, 2011

Punch Clock new release

This is a cross-post from the PunchClockSWT Project Updates. Version 0.2.0 of PunchClock has now been posted.

Major changes:

  • "Fix this row" button on every row, which brings up a dialog to edit the fields for that row and save them.
  • All updates to rows are now audited in a table. This table can currently be dumped to the console through Options > Audit menu item.
  • Rounding errors in the Elapsed time calculation have been fixed. Now 5 digits of precision and a max of two digits after the decimal place.
I learned a few new things in this process. For the fix button I involved more SWT widgets such as TableEditor and explored further the FormLayout options to make a custom dialog for manually inputing data.

On the Derby side, I created additional tables, and had a chance to implement some database Triggers, which was new.

I may write up some of the details of the techniques I used.

Sunday, April 10, 2011

 when Reading a text file in Java

If you have code that processes text files using InputStreamReader, you may be puzzled why there are certain garbage characters  at the start of your resulting String data if you output that the contents of the file.

This is due to a Reader processing your input file in ASCII encoding when the data is stored in UTF-8.

While I came across this in Java, the ASCII/UTF-8 solution was actually in this aptly named blog post "Three little characters  designed to make your life hell" by Martyn at the Ventrino Blog.

The solution proposed in the post is basically "if your text file is saved as UTF-8, that is the problem, save as ASCII encoding instead". I think this isn't really a best practice, probably as UTF-8 is better for internationalization, the developer should probably change his/her code to support that format rather than restrict a program to the limited set of US/Western ASCII characters.

Here is an example of code that when reading a UTF-8 encoded file, say a .HTML file will display the 

//stores the html text, in my case I needed to pass it in to an SWT Browser.setText() method.
StringBuffer buffer = new StringBuffer();
//read the HTML to display from a resource
InputStream htmlInStream = Resources.getResourceAsStream(Resources.HTML_ABOUT_HTML);

BufferedReader bufInpStream = new BufferedReader(new InputStreamReader(htmlInStream));
String line = "";

while(line != null){
line = bufInpStream.readLine();
//System.out.println(line);
if(line!= null){
buffer.append(line);
}
}


The key seems to be the InputStreamReader conversion of the underlying InputStream to the HTML file. Readers are by design for processing text, while Streams are more concerned with binary data. So when converting from the Stream, we have to tell it what encoding to use. This correction will solve the problem.

//if we didn't specify char-encoding as UTF-8, it would show these strange chars: 
BufferedReader bufInpStream = new BufferedReader(new InputStreamReader(htmlInStream,"UTF-8"));


Punch Clock has gone live

I have wrapped up development of a beta version of my side-project "Punch Clock". I've created a launch page on Google Sites, and linked from the side bar.

https://sites.google.com/site/punchclockswt/

The released version is basically a public beta, free for anyone to download. Right now I support Windows and Linux.

The feature set is rudimentary but I am adding features as I have time. It has been a good project to learn the ins and outs of SWT for a basic app. I would like to explore refactoring more the UI to use more of the JFace patterns on top of SWT, I was just beginning to use this with the About dialog and the persistent settings modules. From the beginning this was a learning project, where I picked up Apache Derby, SWT, and created a build process in ANT, launched an entire release site with actual documentation, specified a license for the work etc...

More to follow I am sure.

Saturday, April 9, 2011

Seedling update

"J2"


Our Redwood seedlings have survived the long dark New England winter and are starting to grow new shoots and widen their branches. Of the two J2 seems to have done a little better, on B2 there are some needles turning brown on an upper branch. The crown area of J2 has filled out better. Supposedly redwood seedlings can grow several feet per year, but we haven't seen growth like that yet. It could be the indoors, the pots, or even the lower levels of sunlight during our winters here. To make measuring easier I printed off some some color square rules, one inch squares and taped it to a wall as a background. As you can see the heights are about 15" for J2 and around 12" for B2, which has more of a curve. The length of the lower branches is really amazing now, the longest I've measured is around 9" and each of those has several 3-4" offshoots


"B2"
I was partly inspired to write this after watching a great National Geographic documentary Climbing Redwood Giants (2009) on Netflix. The quality was great in HD, seeing the fully grown giants was impressive. The two main focuses of the documentary were researcher Steve Sillett who using a crossbow(!), ropes and pulleys pulls himself up the giants in order to climb into the canopy and measure them. The other story a pair of researches, Micheal Fay and Lindsey Holm, transecting the known extent of the Coastal Redwood range. While a big focus was on trumpeting successes in stopping old-growth logging of Redwoods and conservation, the sheer size of the trees was the big show. I have had the opportunity to see redwoods in Muir Woods, but nothing like the 350 foot giants in the movie.

The trees ecosystem supposedly supports more biomass than any other ecosystem on Earth, including the tropical rain forests. It was interesting to see the mulberry bushes and other plants growing from the branches of some of the trees, hundreds of feet up. Another star was the Wandering Salamander that may spend its life in the tree canopy. They didn't really mention much about birds or insects nesting in the tree, which I would have assumed to be a big part of the ecosystem, although the tannins in the Redwood bark are supposed to deter insects.


Finally here are a few more pictures of the seedlings, and some of their new growths.
 
"B2" new growth shoot
Another shot of both trees.
Two's company


Sunday, April 3, 2011

Collapsible SWT Text Area Snippet

A little sample code showing how you can have a Java SWT button that can collapse other Controls like a toggle switch. This also will show how to resize the container after "collapsing" your control.

I went this route after not finding the SWT ExpandBar widget suiting this purpose.

Screenshots from Windows 7

Source Code

/*
*
*/
package swt.snippet;

import org.eclipse.swt.SWT;
import org.eclipse.swt.events.SelectionAdapter;
import org.eclipse.swt.events.SelectionEvent;
import org.eclipse.swt.graphics.FontMetrics;
import org.eclipse.swt.graphics.GC;
import org.eclipse.swt.graphics.Image;
import org.eclipse.swt.layout.GridData;
import org.eclipse.swt.layout.GridLayout;
import org.eclipse.swt.widgets.Button;
import org.eclipse.swt.widgets.Display;
import org.eclipse.swt.widgets.Event;
import org.eclipse.swt.widgets.Group;
import org.eclipse.swt.widgets.Label;
import org.eclipse.swt.widgets.Listener;
import org.eclipse.swt.widgets.Shell;
import org.eclipse.swt.widgets.Text;

import com.brianl.timetrack.controller.TimeSession;
import com.brianl.timetrack.view.CollapseButtonListener;

/**
* Simple SWT Shell that contains a Group with some controls. An arrow button is
* used to toggle the Text area widget as collapsed or not.
*
* @author ammianus http://librixxxi.blogspot.com/
*
*/
public class CollapsibleTextBox {

private static final int NUMBER_GRID_COLUMNS = 1;

private Display _display;

private Shell _shell;

CollapsibleTextBox() {
_display = new Display();
_shell = new Shell(_display);
_shell.setSize(300, 250);
// Collapsible Group
_shell.setText("Collapsible Group Example");
// format shell as single column grid layout
_shell.setLayout(new GridLayout(NUMBER_GRID_COLUMNS, true));

// create the group
Group collapseGroup = new Group(_shell, SWT.NONE);
GridData groupGrid = new GridData(SWT.TOP, SWT.LEFT, false, false);
groupGrid.horizontalSpan = 1;
collapseGroup.setLayoutData(groupGrid);
collapseGroup.setText("Control Group");

// create a Label and Button inside the Group
GridData labelGridData = new GridData(GridData.VERTICAL_ALIGN_END);
labelGridData.horizontalSpan = 1;
String labelText = "Pressing button toggles Text. ";
final Label instructionLabel = new Label(collapseGroup, SWT.NONE);
instructionLabel.setText(labelText);
instructionLabel.setLayoutData(labelGridData);
instructionLabel.pack();

final Button collapseButton = new Button(collapseGroup, SWT.ARROW
| SWT.UP);

// multi-row Text area with word-wrap
final Text textArea = new Text(collapseGroup, SWT.MULTI | SWT.LEAD
| SWT.BORDER | SWT.WRAP);

// set height and width of Text area
GC gc = new GC(textArea);
FontMetrics fm = gc.getFontMetrics();
final int textBoxWidth = 50 * fm.getAverageCharWidth();
final int textBoxHeight = 4 * fm.getHeight();
gc.dispose();
textArea.setSize(textArea.computeSize(textBoxWidth, textBoxHeight));
GridData textBoxGrid = new GridData(SWT.TOP, SWT.LEFT, false, false);
textBoxGrid.horizontalSpan = NUMBER_GRID_COLUMNS;
textBoxGrid.heightHint = textBoxHeight;
textBoxGrid.widthHint = textBoxWidth;
textArea.setLayoutData(textBoxGrid);

// set the layout for the items contained by the Group as a two column
// grid
collapseGroup.setLayout(new GridLayout(2, false));
collapseGroup.layout(true);

// create a listener that waits for button press
collapseButton.addListener(SWT.Selection, new CollapseButtonListener(
textArea, textBoxWidth, textBoxHeight, collapseGroup,
textBoxGrid));

// open the shell and run UI loop
_shell.pack();
_shell.open();
while (!_shell.isDisposed()) {
if (!_display.readAndDispatch())
_display.sleep();
}
_display.dispose();
}

/**
* Runs the demo
*
* @param args
*/
public static void main(String[] args) {
new CollapsibleTextBox();
}

/**
* inner class handles button click events for arrow button
*
*/
public class CollapseButtonListener implements Listener {

private Text _timeNotesBox;
private int _textBoxHeight;
private int _textBoxWidth;
private Group _container;
private GridData _textBoxGrid;

/**
* @param timeNotesBox
* @param textBoxHeight
* @param textBoxWidth
* @param container
* @param textBoxGrid
*/
public CollapseButtonListener(Text timeNotesBox, int textBoxWidth,
int textBoxHeight, Group container, GridData textBoxGrid) {
super();
// save references to the various controls to update
this._timeNotesBox = timeNotesBox;
this._textBoxHeight = textBoxHeight;
this._textBoxWidth = textBoxWidth;
this._container = container;
this._textBoxGrid = textBoxGrid;
}

/*
* (non-Javadoc)
*
* @see
* org.eclipse.swt.widgets.Listener#handleEvent(org.eclipse.swt.widgets
* .Event)
*/
@Override
public void handleEvent(Event event) {
// toggles the Text Area as visible or not.
// When Text Area is collapsed, resize the parent group
if (_timeNotesBox.getVisible()) {
// collapse the text area
_timeNotesBox.setSize(_timeNotesBox.computeSize(1, 1));
_textBoxGrid.heightHint = 1;
_textBoxGrid.widthHint = 1;
_timeNotesBox.setLayoutData(_textBoxGrid);
_timeNotesBox.setVisible(false);
_timeNotesBox.pack(true);
System.out.println("Hiding textbox");
} else {
// expand text area back to original sizing
_timeNotesBox.setSize(_timeNotesBox.computeSize(_textBoxWidth,
_textBoxHeight));
_textBoxGrid.heightHint = _textBoxHeight;
_textBoxGrid.widthHint = _textBoxWidth;
_timeNotesBox.setLayoutData(_textBoxGrid);
_timeNotesBox.setVisible(true);
_timeNotesBox.pack(true);
System.out.println("Showing textbox");
}

// in this case the container is the Group
_container.pack(true);

// resize the parent shell too
_container.getParent().pack(true);
}

}
}


Built with:
swt-3.6.1-win32-win32-x86
Java 1.6.0_17
Eclipse 3.4.1

Built on the model of the snippets from java2s and the SWT snippets site.

I came up with this approach as I am trying to have an optional text box in my "Time Track" program. I really didn't see any other way to have this kind of dynamic visual behavior that is pretty common on websites these days. The only prebuilt widget that seemed similar was the ExpandBar, but what that did was create a large pane with expandable widgets within it. These all had a very non-native look and feel and was bit complex to set up when I had a single text box to expand/collapse.